When I was a child, I remember my mom telling me that it was bad luck to put your shoes on a table. I don’t necessarily subscribe to superstitions, but this one always stuck with me. I mean, it makes sense: the dirtiest items that we wear shouldn’t go on the place from which we eat. While I do a lot of things inconsistently (call friends, floss, sleep, etc.), I never, ever put shoes — either by themselves or in bags or boxes — on the table. I just don’t. Until…
I was feeling a little cavalier last week, I put my giant Timbuk2 on a table in my office. I knew that it had a back-up pair of flats in there, but I thought, “eh, it’s just an old wives’ tale — nothing will happen!”
And nothing happened. That day.
Then I get a text from my aunt saying that my grandmother fell and was in the ER.
And then I dropped my iPhone and cracked the screen — when I’ve never damaged a phone in 15 years of having one.
And then I got not one, but two of those automated tickets from a traffic camera.
And then I lost money at work.
Phew. It’s been a long week.
Dress: Taylor via TJ Maxx
Cardigan: LOFT
Shoes: TOMS
Necklace: ModCloth
Watch: Fossil
These photos are actually from before my bout of bad luck — when I found this dress that Stitch Fix was sending out last year on sale on the TJ Maxx website and when I wore said dress to work and didn’t get a spot of stage blood on it. Amazing feat, right?!
As you know, I love a good deal — which it why I peruse the TJ Maxx website often. And lately, I’ve located a few dresses that were featured in Stitch Fix ads/reviews at great prices. Want some examples?
Obviously, there’s the dress pictured above, which I originally read about on the Crazy Together blog. TJ Maxx has it in both grey and blue right now; originally it was $98, while I found it for $40. (Also: if you’re looking for a similiar, but not exact match, to Maria’s red lacy dress, here’s one at $35 from London Times.)
Finally, there’s one size 10 Taylor “Two-fer” on Nordstrom Rack, also featured on IG.
Holy rabbit-hole!
Good luck to any ladies looking for some Stitch Fix dresses on the cheap. And, if you order shoes to go with your new frocks, don’t put the box on a table, lest you want a slew of bad karma.
B took these photos of me probably a couple of weeks ago (I know, I know! I’m late!) and I’ve been meaning to put up a post but lost track of time. Then — snow. Ugh. Snow.
I wanted to write about how I’d been doing on my gym-going endeavor, including the fact that I ran three miles before these photos were taken at 10am! I wanted to share the trials of finding the right weight to lift. Or how I was starting to feel pulled together and healthy again. Or how I was trying out some new heels that day at work because I felt spunky. Then — snow. Ugh. Snow.
Shirt: LOFT
Jeans: Gap
Shoes: TOMS
I look at these photos now — taken on a sunny, fairly mild January morning — and I think about how volatile my moods are in the winter. Once we hit late January/early February, with those first few substantial snowfalls and grey, murky days, and my mindset explodes. I always think of the first line of Tony Hoagland’s “Reasons to Survive November”: “November like a train wreck.” Except November is February, in this case.
I’ve spent the past week or so unable to truly focus — maybe enough to muster reading a couple of pages of a book or folding half my laundry — but I find things of substance so hard to deal with. Answering emails with thoughtful, timely responses? Debilitatingly difficult. Buying and sending birthday and Valentine’s Day cards? Probably not this year. Making a simple phone call to, say, the bank? Maybe I’ll feel better and less worn out tomorrow.
And sleep? Any days I’ve had off — hell, if I get home early enough from work — I spend upwards of 12 hours sleeping, only to wake up still headachy, tired and sore. And it’s not that I’ve slept too much and it’s a vicious cycle, it’s much more of a pseudo-hibernation state.
But I plow through. I take my vitamins and drink water. I let myself eat an extra cookie or cuddle next to B for an extra 9 minutes in the morning. From going through this for so many years before, I know this won’t last forever. It’ll be spring in eight weeks, then summer and I’ll feel like myself again.
(But still, despite the forced optimism, I really do hate this time of year.)
This weekend, with the predictions that we’d get hit with a mega snowstorm, I decided to use the housebound time as an opportunity to henna my hair. I’ve been using Lush’s Henna Hair Dye for a couple of years now because I was curious about the “all natural” method of coloring my hair after years of conventional home dyes. Unlike chemical dyes, which, from my understanding, rip open your hair follicle and replace your natural color with a dye, henna actually slowly permeates your follicles while sealing them. While chemical dyes can leave your hair brittle and weak from this damaging process, henna is restorative and healthy.
A few years ago, I started with Lush’s “caca marron” (yeah, weird name, I know), which boasted that it dyed hair a “deep chestnut.” I always ended up a redhead, along the lines of Emma Stone. Recently though, I’ve wanted something darker, so I tried “caca brun,” which gives me the right deep and dark brown that I want in the fall/winter months.
So, here’s what you need:
A brick of henna hair dye
Extra spices (optional)
Cutting board
Sturdy knife
Dish cloth
Heat-resistant bowl
Wooden spoon
Lots of newpaper
Vaseline, Waxelene, or Ultrabalm
Gloves
Grubby t-shirt
Plastic wrap
Good book to pass the time (or Netflix… or moderate amounts of wine)
Shampoo
Conditioner
Not pictured, but also needed: boiling water and hair clips.
Step 1: Lay out newpaper (or grocery ads, whatever) all across your bathroom floor and in your sink. Henna gets MESSY!
Step 2: Unwrap your brick and cut it up. I put the dish towel over the knife back because the bricks are hard to cut.
The bricks are actually lined so you can easily cut your brick into six squares. I cut the block down to squares, portion out what I need, bag the remainder in a Ziploc, and chop what I’ll use into smaller bits.
Because I have shoulder length hair, I use about two squares. The Lush employees initially suggested I use more (like three or four squares), but I find that I have too much product left over. Plus I’m cheap and like to squeeze as many dyes as I can out of one $27 brick!
(Lush also recommends using one square and doing a test on a strand of hair before doing your whole head. I skipped the test because I’ve used this dye before and I’ve dyed my hair every color, so I really don’t care about what color it turns out. If you do the test, take one square and follow the same directions for cooking and treating a strand at the nape of your neck before doing your whole head.)
You’ll notice some weird powder in this photo: it’s cinnamon and cloves! I read that cinnamon, cloves and coffee will increase the brown color, while paprika or red wine will increase the red. Feel free to experiment (just do so in moderation the first few times you henna so you get a sense of color). I used about a teaspoon of cinnamon and a half-teaspoon of cloves.
Step 3: Add just-under-boiling water. You want the water hot enough to mix and melt the henna chunks, but not enough to burn your head. You also want enough water that you’ll get a fair smooth paste: not thick and dry, nor watery and runny.
Step 4: Mix and break up the henna chunks. My mix ended looking like this, kind of like batter, with some chunks of henna in it, but fairly smooth overall.
Step 5: Head the bathroom with that bad boy mix! Make sure any cats are out of there before application because you don’t need a henna-ed feline. I nestle my bowl in my bathroom sink.
Step 6: Pin your hair up in segments. I leave the lower half of my hair — below my ears and by my nape — down because I’ll start with that section first. I pin the upper part of my hair — at the crown of my head — because I’ll work up that area last. It’s easier to do the hardest parts of your hair and head first because you’re essentially applying impenetrable mud to yourself.
Step 7: Apply your Vaseline, Waxelene, or Ultrabalm all along your hair line. That includes your forehead, in and behind your ears and at the nape of your neck. It’s ok if a little gets in the random strands of your hair. This is to protect your skin from getting tinged any weird shades of red or brown.
Step 8: Put on your gloves.
Step 9: Take a big ole glop of henna from your bow; I used my hands, but you could probably try a brush of some sort. Apply said glop to the lowest part of your hair, that bit that’s hanging down at your nape. Pretty much, you want to take the henna and apply/rub/mush into your hair from your roots to ends. Apply until that section is saturated.
I take each glopy section, twist it, and press it to my scalp. The henna paste works like a strong enough adhesive to make that twist stick to my head.
Step 10: When the lower half is done, take down another section that you’ve pinned up and apply the henna as you did to the lower section by applying, rubbing, and mushing. Twist and stick to your head if you can. Finish with the final section in the same manner.
Step 11: When you’ve finished all the sections, apply any extra henna to your head as a general covering. I pretty mush make a henna helmet.
Step 12: Remove your gloves carefully.
Step 13: Very carefully, take your roll of plastic wrap and wrap your entire henna-ed scalp in plastic. It make take several passes, but cover everything. I always end up going a couple of inches below my hair line at my nape and over my ears. You won’t be pretty, but it’ll help from getting henna EVERYWHERE while you let it cure.
I made a time lapse video of steps 6 through 13. It’s about 40 seconds, but I think it took me approximately 25 minutes from applying the Waxelene to plastic wrapping. Remember: I’ve done this a few times, so your first attempt may not be as quick or as easy.
Step 14: I always get henna down my shirt so I stand in the shower to remove my henna-ing shirt, wipe any excess off, and maybe put on another crummy shirt for the wait.
Step 15: Wait for two to four hours. (I know — forever!). I like to use this time to read a book, watch some Netflix, and drink a glass of wine.
Step 16: Shower time. I try to rinse as much crud (because it will feel like this) out of my hair first, usually by turning my head upside down in the shower. Then I shampoo, which releases a lot of the henna. Then I condition — sometime twice — until I feel all of the product is out.
Step 17: Dry your hair with a dark towel or old t-shirt. While I’ve bleached henna out of white towels, I’ve learned to just avoid dying them accidentally entirely. Also, remember to q-tip your ears! (I find henna everywhere on me: ears, armpits, between toes…)
Step 18: Enjoy your new hue!
Is this a super intense way to dye hair? You betcha! Why would on earth would I spend 3-4 hours on this process when I could easily go to salon and/or home dye in a third of that time?!
First, the color lasts a lot longer I find; any time I’ve chemically dyed my hair this shade of brown, it turns red in two weeks. This color will last me about four to six. Second, my hair feels so much healthier with henna than chemical dye — softer, smoother. Three, I love the more natural color because my highlights come through my predominantly this way and it fades naturally too, instead of that weird root landing strip effect. Four, I like to have this time to pamper myself (henna nights are also my pluck-and-wax-random-hair/shave-and-lotion-leg/use-my-most-expensive-face-mask all while drinking wine nights). This ain’t for everyone, but I like it!
It’s been a week since I turned 30, so I figured I should write about it for posterity’s sake!
From Thanksgiving through my birthday in early January, there’s normally a weird, stressful vibe in my life. B and I both tend to work 50+ hour workweeks because of our respective full-time jobs and our shared part-time gig. Plus there’s family fighting and all that junk which always comes up at this time of year. (I honestly can’t remember the last time I didn’t cry on Christmas Eve/Day.) Finally, I really do not like the winter, to the extent of looking into SAD therapy lights to help me make it through. Needless to say, birthdays can be emotionally erratic .
When my 30th arrived, I was surprised at how awesome it was! It was a low-key, fun day: texts from friends; raspberry-and-chocolate chip pancakes; a solid gym visit. B had been worried that my gift wouldn’t arrive in the mail until the USPS truck rolled up outside our house.
What was in the package? Just the prettiest necklace that I’ve wanted for a couple of years now!
(You can find other stunning wax seal pendants from Plum and Posey here.)
We finished the day with a fancy-schmancy dinner with friends downtown, where we feasted for hours! When we came home — stuffed and waddling — B and I took some photos and then he finished my favorite birthday cake. By midnight, I was fat and happy.
A week before my birthday, I had attended a “new year, new you” yoga class. While the title was silly, it was taught by a teacher I love. During the session, he shared his own emotional journey to yoga, even tearing up in front of a class of 30 students. That raw honesty — especially about a lot of the same personal problems I share — moved me and struck a deep cord. The instructor explained the pratfalls of setting New Years’ resolutions, how they’re created out of anger or frustration with oneself. Instead, he offered the alternative, more positive idea of setting intentions, which allow one to return to them in the event of failure.
While I never make New Years resolutions, I have made birthday ones for years, seeing it as a more personal promise to myself. And this year, I’ve decided to rename this endeavor “birthday intentions,” mainly because I’m human and I fail, but this re-titling, hopefully, will allow me to return to these tabula rasa-style.
Already 2016 has been one of major change: I turned 30; have been a home owner for a year; returned to work with a major promotion; and lost my closest, bestest colleague to retirement.
While there’s a lot more suddenly expected of me, my biggest aspiration to care for myself first and foremost. How exactly?
I’ve joke often that I cut myself out of my life first when work needs doing: I’ll commit 60+ hours a week to the museum and theatre and make myself miserable. That’s stopping. I’m taking days off. I’m going home when my time is done. I’m not using “but I have to work” as excuse when friends want to hang out. While I need to work two jobs still, my first priority is me.
With that all said, I really need to start caring for myself on a physical level. This past December, I don’t know how often I would come after a double, sit on the couch and sob because I hurt. I had seven or eight knots up and down my back and constant headaches; I was simply exhausted. It wasn’t pretty. And I put on weight too. This year, I’m intending to lose some weight (10 pounds would be perfect, 20 preferred by my doctor). I’m recommitting to running and yoga and drinking water and sleeping and eating well.
“Eating well? But, Jenn, you don’t cook!”Guess what else I’m endeavoring to do, folks! Those who know me “IRL” know my aversion to cooking food, but I’m realizing how impractical it is to subsist on take-out, both physically and financially. B and I have taken turns cooking this week: Italian wedding soup, Thai-style chicken pumpkin stew, and, last night, salmon and “poor man’s risotto” (yum!). I forget how nice it is to have a built-in lunch plan, as well as how my week’s half of groceries is the equivalent of eating out two or three times.
Holy cow! Cooking at home saves cash! As does being intentional and decisive when buying stuff. I tried out the KonMari method at the beginning of the new year and I’ll admit that throwing away a lot of stuff really sparked a desire to cut back on spending. Sure, I’ve been online window shopping for pretty dresses, striking work-out clothes and snazzy shoes, but I haven’t committed to anything because I don’t want to waste: cash, space and time (because I regret-return stuff a lot too).
And finally: I want to have friends! (Whaaaaat?!) This sounds weird, right? I’ve admitted that I’m anxiety-ridden and shy. But I’ve had three separate conversations this week with other people about how they feel the exact same way. So I’m really going to attempt to stop letting my flight reflex control my sociability; I know a lot of awesome people liminally and I don’t want to waste time not being friends with them. I got my first taste this past weekend – between a bookclub meeting, birthday dinners and a catch-up lunch — and I loved feeling like a new me.
There you have it, kiddos. My long-winded recap of birthday festivities and my intentions for 30. Are there other things I’m endeavoring? Sure, but I’m thinking they’re really going to grow out of the wellness-plan I’ve already laid out for myself.
I’ve continually gone back and forth on Stitch Fix. My first few fixes were HORRIBLE! There was one fix in which the stylist (not Alessandra, mind you) pretty much said “here’s some stuff. enjoy…?” and sent me every single thing I mentioned I wanted to avoid. But then I’ve had some great finds, including a number of lovely dresses. Pretty much, once Alessandra stepped in, I’ve have moderate success.
When I requested my “birthday fix” in December, it was totally in the stressed-before-the-holidays spirit — usually when I’m apt to spend a lot of money on “retail therapy.” Then, when we hit 2016 and I resolved to be better about money, I regretted requesting a fix, knowing I’d spend more money on a single item than I would otherwise. I vowed not to keep anything…
This is the worst piece in the box. I just wanted to throw that fact out there, in case you couldn’t tell by the expression on my face.
The material was super thin and the shape was boxy beyond belief. Also, can we talk about the weird draping that happens because of the pleats at the neckline? I don’t mind pleating — except when it puts extra fabric in the position of falling between breasts and highlighting just how chesty I am. Oh — and the sleeves! There’s no cuff! It’s like their giant red tubes of fabric. Annnnd there are grommets. But the color is nice, I guess… Returned.
Item #2: RD Style’s Adriene Dress ($88)
When I snuck a peak at what was coming in this fix, I was dismayed at this dress because I had specifically requested no grey.
Then I opened my box and realized, “Alessandra’s too good; it’s not grey, it’s SILVER!” The dress was really pretty and shimmery; I could so easily dress this up or down as needed. But A sent me a large and well, holiday sweets and birthday cake happened before my fix arrived. I took a profile photo to show how clingy the dress was, but decided not to post it because I look pregnant. Oops.
If A had sent the dress one size up, I would have kept it. Returned.
Item #3: 41Hawthorn’s Moni Geo Print and Camisole Blouse ($58)
I guess A knew how much I love my black version, so she sent a fun, patterned version. While I probably wouldn’t have chose this pattern myself, I really, really like it — like, scarily so.
Two small gripes. One: the shirt is ever-so-slightly tight around the shoulders. It wasn’t a big enough deal for me to pass up this blouse, but it’s something I don’t remember from the black version. Two: this is a set with a matching light blue cami. That’s usually a bonus, except when the cami feels and fits like it’s from the little girls’ section. I thankfully have some alternatives to switch it out for. Kept.
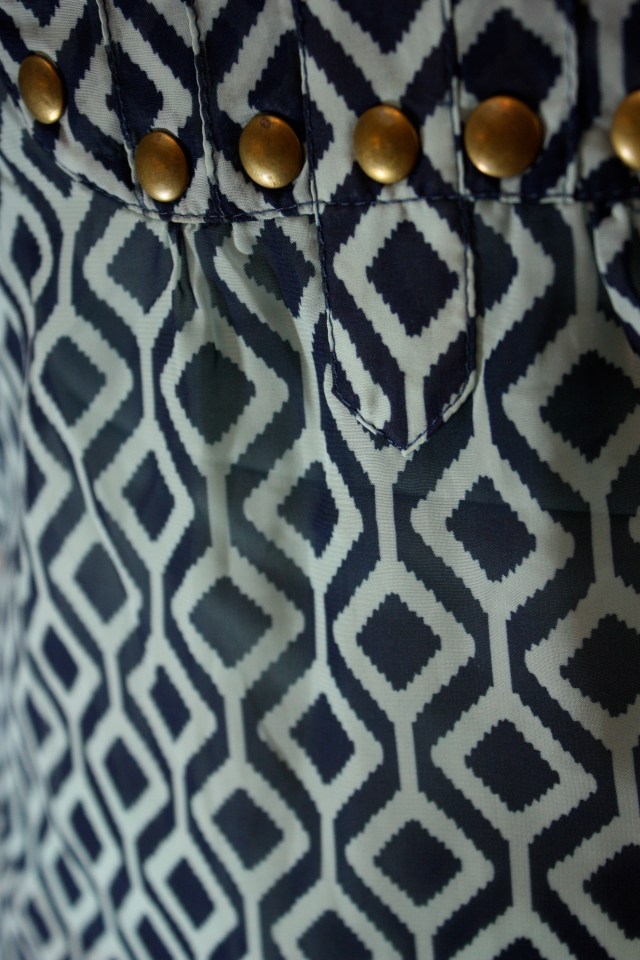
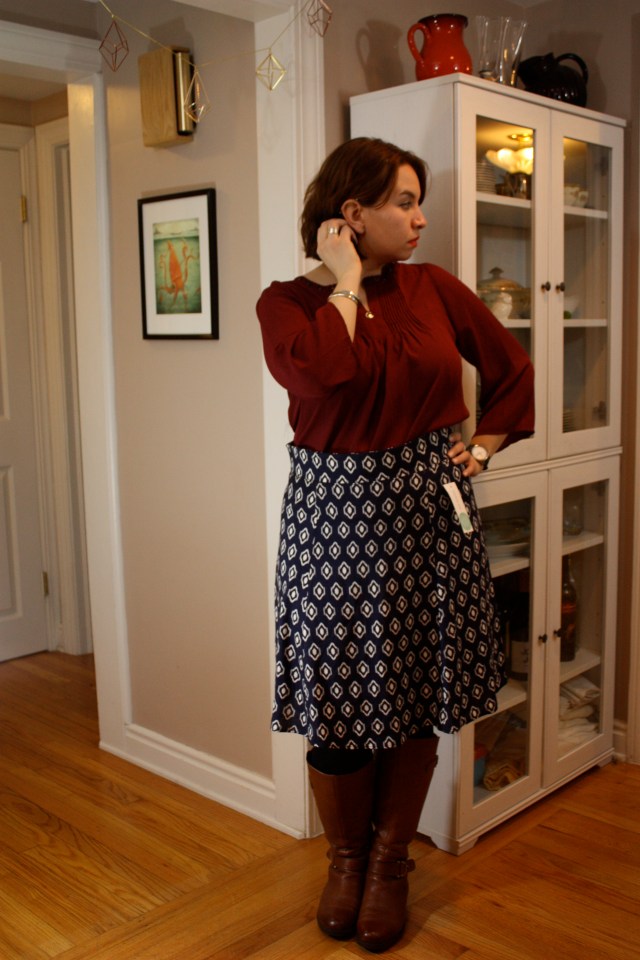
One of intentions for 2016 is to not spend money unnecessarily, which is so sad considering this skirt. I loved it. It’s a lined, A-line navy bottom with a pop of white… Kind of like this skirt that I already own…
Really, I loved this skirt, but I couldn’t justify spending $58 on something that is way too close to a piece I already have.
The fabric was soft and the flow of the material was great, not too clingy like cotton can be. There’s an exposed silver zipper in the back, for some added punchiness. I paired it with the XX top, as Alessandra suggested, and I love that color combination with the brown boots (though I don’t look enthused because of that damn top!).
Alas, alack, I sent it back. Returned.
Item #5: Adrianna Papell’s Kalla Dress ($118)
When I saw that I getting this dress (and then I saw the price!), I promised myself up and down I wouldn’t fall in love and keep it. Then it arrived and that promise faltered a bit. And then I put it on, looked in the mirror, and said, “damn it!” B’s reaction when he saw me in it sealed the deal: it needed to live in my wardrobe.
The material is thick and wears really well. As you can see in the photo, the color is gorgeous: it shimmers in the light in just the right way. And that lovely notched V into the neckline can be either modest or revealing! There’s some substantial ruching at the tummy; I read other reviews that said it added extra weight to their figure, but I’ll actually say that it really didn’t added more to me than was already there. I wasn’t displeased by the cut (although I’ve already mentioned I gobbled a lot of sweets this holiday and birthday season).
Needless to say — I kept it and wore it to my fancy-shmancy birthday dinner. Kept.
Hit or miss: 4/5 pieces were ones that I loved! Admittedly, I spent more money than I had intended but that Adrianna Papell dress was stunning. Minus some wardrobe duplication and size issues, I probably would have kept more from this birthday fix. Huzzah!


